Image Capture - Camera/Photo Library
Description
Capture an image using the camera, or from the photo library. On devices that don't support a camera, select an image from the filesystem. Action calls a function with the Image URI when the image has been obtained.
The Image Capture - Camera/Photo Library action is used with the UX component. This genie that appears when this action is selected allows you to set how you want to capture an image. On a device that has a camera, the image is captured using a camera. For devices that do not support a camera, you can choose an image from the filesystem. Camera access is either done using Cordova or HTML5. Once the image has been captured a Javascript event is fired.
The 'Image Capture - Camera/Photo Library' action allows you to specify some Javascript code to execute once the image has been acquired. Your Javascript code can reference:
e.data - the base64 encoded image data
e.fileSystemURL - (Cordova only) the native file system URL for the image.
Adding Videos to the Image Capture Photo Library
The "Image Capture - Camera/Photo Library"" action allows the user to select videos from the Photo Library. This only works in a Cordova application. The Type property, shown in the image below, is visible if the Image capture method is set to "PhoneGap" and the Picture source property is set to "Photo Library".
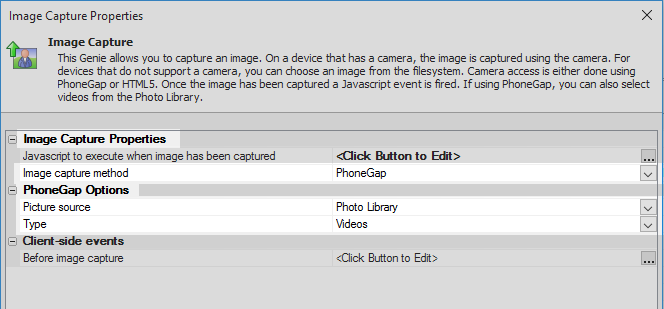
Once the user has selected a video from the Photo Library, the Javascript defined in the "Javascript to execute when image has been captured" property is executed.
Your code can reference e.fileSystemURL, the filename of the video file. You could use this value to set the value of the VideoPlayer control so that the video can be played back, or you might want to upload the video to your server, or to Amazon S3. For example
{dialog.object}.setValue('myvideoplayer',e.fileSystemURL)Image Capture Properties
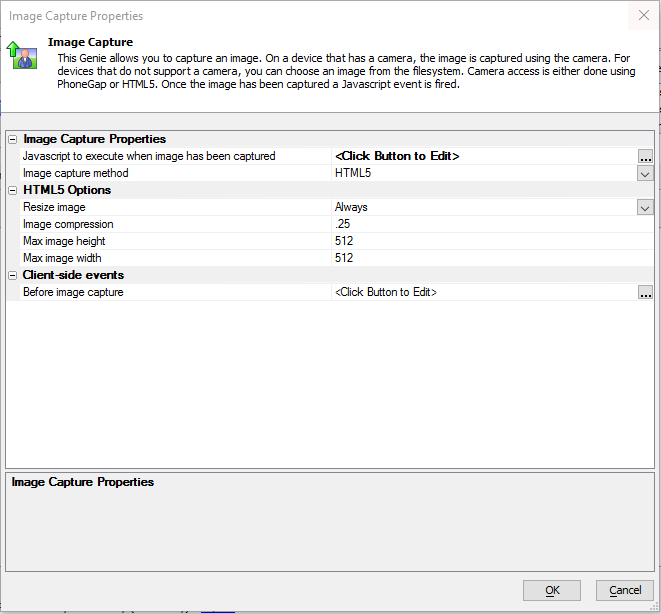
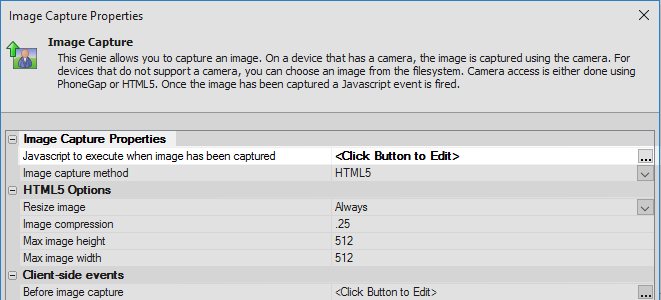
- Javascript to execute when image has been captured
Specify the Javascript to call once the image has been captured. Your Javascript can reference e.data. In the case
- Image capture method
Specify the method for obtaining the image. If the component is running in a Cordova shell, then you can use Cordova to access the camera (if you are not in a Cordova shell, the user will get an error if they try to capture an image). If you select 'PhoneGapPreferred' then the PhoneGap method will be used if the component is running in a Cordova shell, otherwise the HTML5 method will be used.
- Move file to permanent storage after capture
This property appears if the Image capture method is set to PhoneGap or PhoneGapPreferred. When an image file is captured using the PhoneGap the captured file is placed in a temporary storage location that could be cleared when the app is terminated. Therefore, it is advisable to move the file to a permanent location.
- File system part2
This property appears if the Image capture method is set to PhoneGap or PhoneGapPreferred and is used with iOS. The 'public' option is the application's 'Documents directory', accessible in iTunes file sharing and backed up to the iCloud. The 'private' option relates to the application's private persisted data, which is deleted when the application is uninstalled. The 'saved' option is similar to 'private', but is backed up to iTunes.
- Folder2
Specify the folder in the file system where the file should be stored.
HTML5 Options
- Resize image
Specify the policy for resizing the image. The 'Always' option will cause the image to always be resized, regardless of its raw size. The 'Only If Image Exceeds Max Size' setting will cause the image to be resized only if the raw image size is greater than the maximum image size.
- Image compression
Specify the image compression factor to use when capturing an image using HTML5. When set to '1' there will be no compression. For maximum compression use '0'.
- Max image height
Specify the maximum image height (in pixels).
- Max image width
Specify the maximum image width (in pixels).
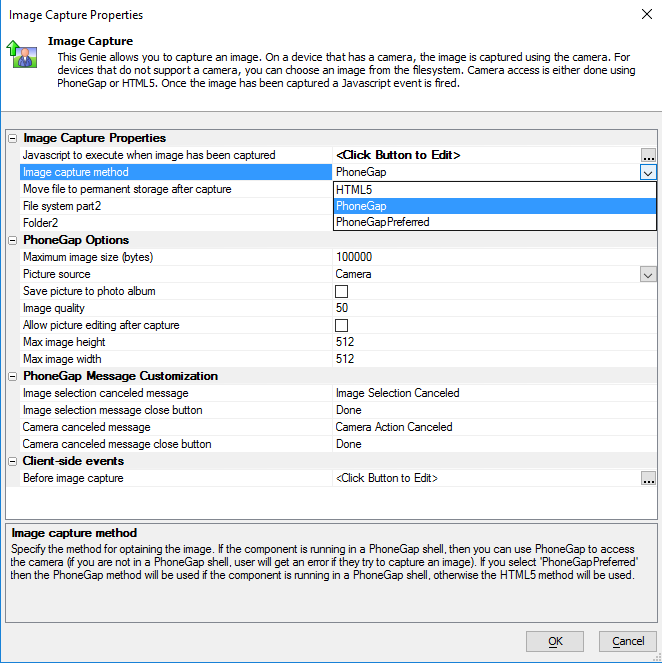
PhoneGap Options
- Maximum image size (bytes)
Specify the maximum image size (in bytes) that can be captured. Set to -1 for no limit (NOT RECOMMENDED)
- Picture source
Specify if the image should be captured by using the camera to take a picture, or if the user should select the image from the Photo Library on the device.
- Save picture to photo album
When enabled, the image is saved to the device's photo library.
- Image quality
Specify the image quality when using Cordova.
- Allow picture editing after capture
Can the user edit the picture after capturing it?
- Max image height
Specify the maximum image height (in pixels).
- Max image width
Specify the maximum image width (in pixels).
PhoneGap Message Customization
- Image selection canceled message
By default this reads 'Image Selection Canceled'
- Image selection message close button
The default text reads 'Done'.
- Camera canceled message
The default message is 'Camera Action Canceled'
- Camera canceled message close button
The default text reads 'Done'.
Client-side events
- Before image capture
Specify the Javascript to run before the image is captured. If your code contains 'return false;' then the image capture is cancelled.
Use an 'Image Capture-Camera-Photo Library' Action to Add an Image to a Component
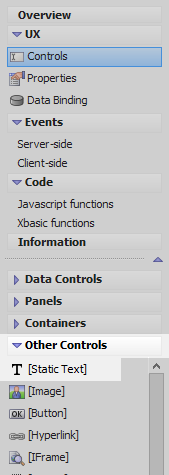
In the UX Builder on the Controls page open the 'Other Controls' menu. Click on the [Static Text] option to add a Static Text control to the component.
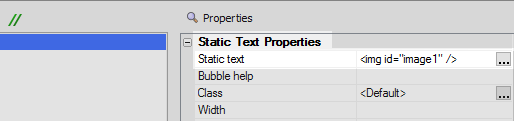
[Highlight the Static Text control. In the properties list on the right set the 'Static text' property to be the following:
<img id="image1" />
In the Other Controls menu click on the [Button] option to add a button to the component.
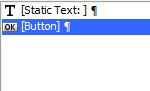
The controls tree should look like this:
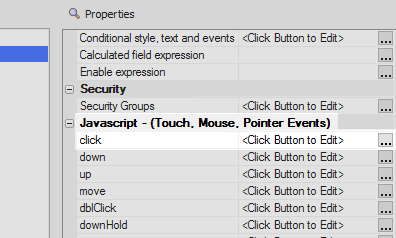
Highlight the button. Scroll down the button's properties list on the right. In the 'Javascript - (Touch, Mouse, Pointer Events)' section click the [...] button next to the 'click' property.
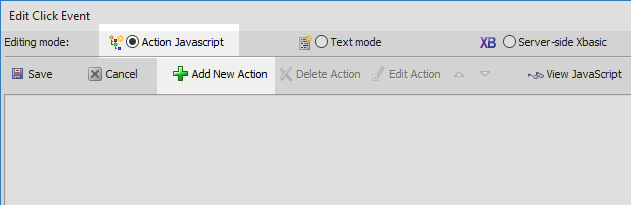
In the 'Edit Click Event' dialog leave the radio button set to 'Action Javascript' and click the 'Add New Action' button.
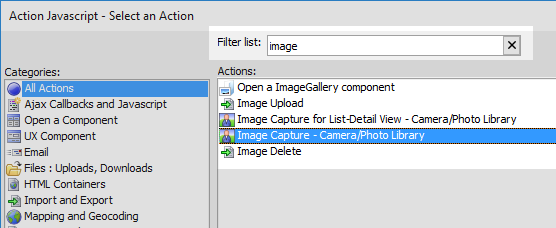
In the 'Action Javascript - Select an Action' dialog, go to the Filter list and enter 'image'. Select the 'Image Capture - Camera/Photo Library' action and click OK.
In the 'Image Capture Properties' dialog click the [...] button next to the 'Javascript to execute when image has been captured' property.
Add the following line of code to the onImageCapture event.
$('image1').src = e.data;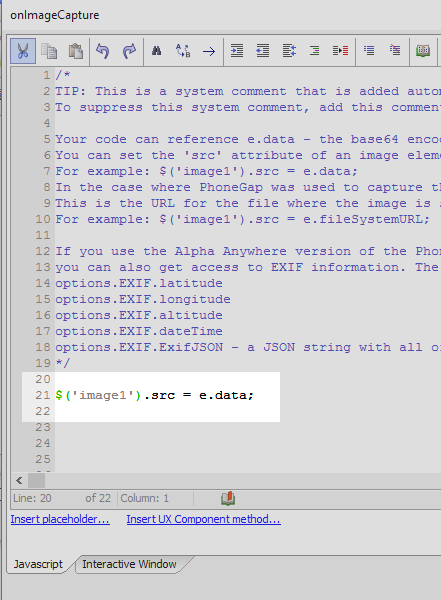
Click OK, OK, and Save. Run the Component in Live Preview.
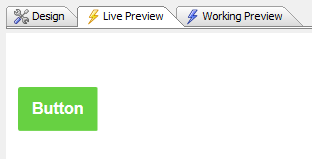
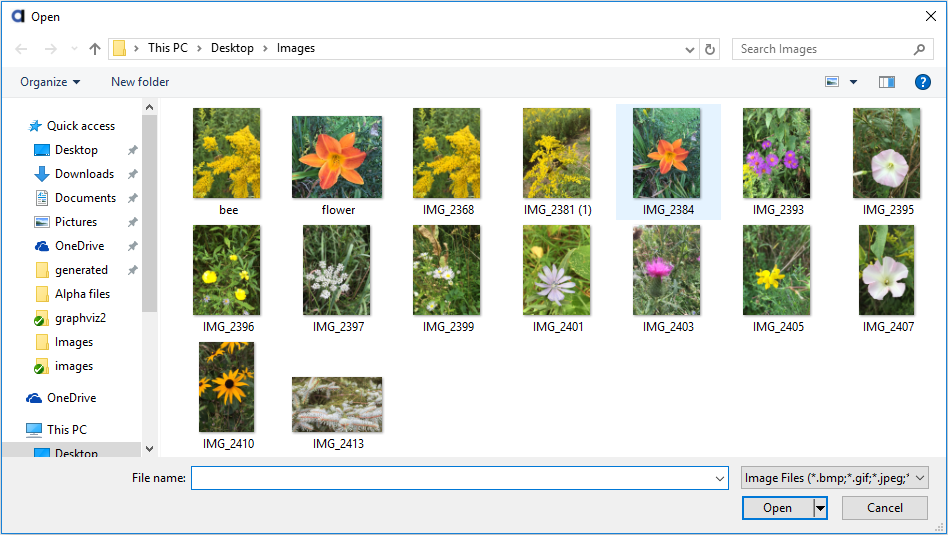
Click the Button you defined. The Image Capture-Camera-Photo Library action will prompt you to open an image on your computer. Open an image.
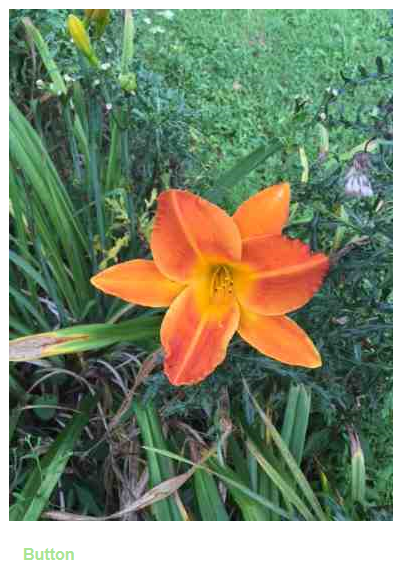
The image should automatically be displayed in the Static Text control.
See Also